The Section widget helps you add distinct sections to your Email. You can drop any number of widgets onto a Section. You can then move and rearrange the Section in the Email as a single unit. Also, when you duplicate a Section, the Section is duplicated as a whole, i.e., along with the inserted widgets.
This Section widget can come in handy when creating templates for your brand communication.
For example, you can use the Section widgets to create templates with predefined headers and footer sections. The content sections can then be added to the Emails as you prefer.
How to use a Section Widget in an Email Campaign?
Step 1
Navigate to the Email Creator
Use the Main Menu on the left to create an Email and subsequently navigate to the Email Creator.
Step 2
Add a Section widget to your Email
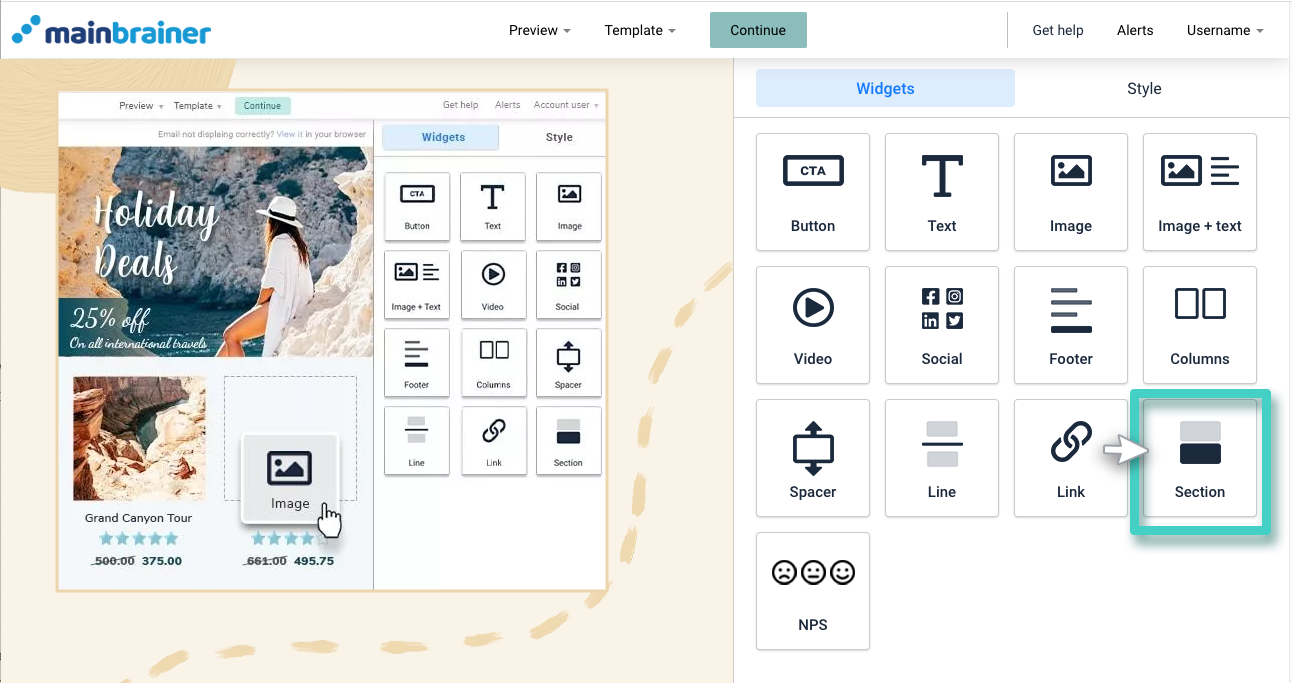
The blank area on the left is the Work area where you design your Email, and the area on the right is the Tools area where all the available design elements are displayed as Widgets.
To add a section to your Email, drag and drop the Section widget to the work area (as highlighted in the screenshot below).
Step 3
Design the space as required
Once you drop the widget into the Work area, the widget Settings are displayed on the right (as highlighted in the screenshot below).
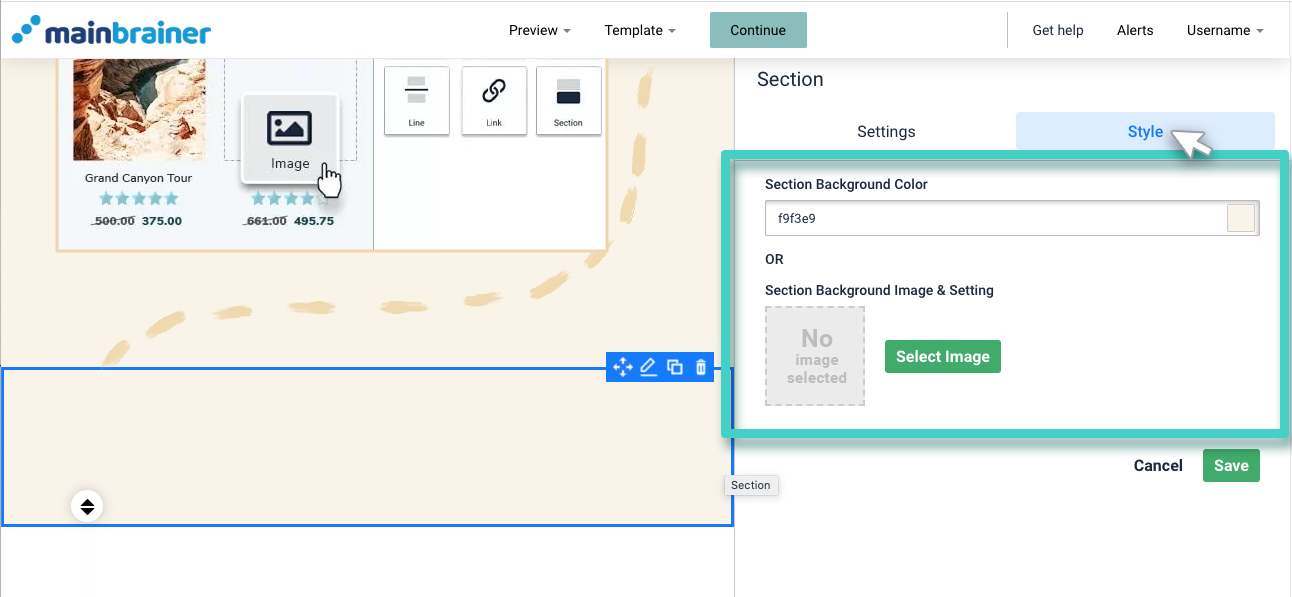
Use the options under the Style tab to customize the section background as you prefer. Click Save.
Step 4
Add other functional elements to this horizontal space.
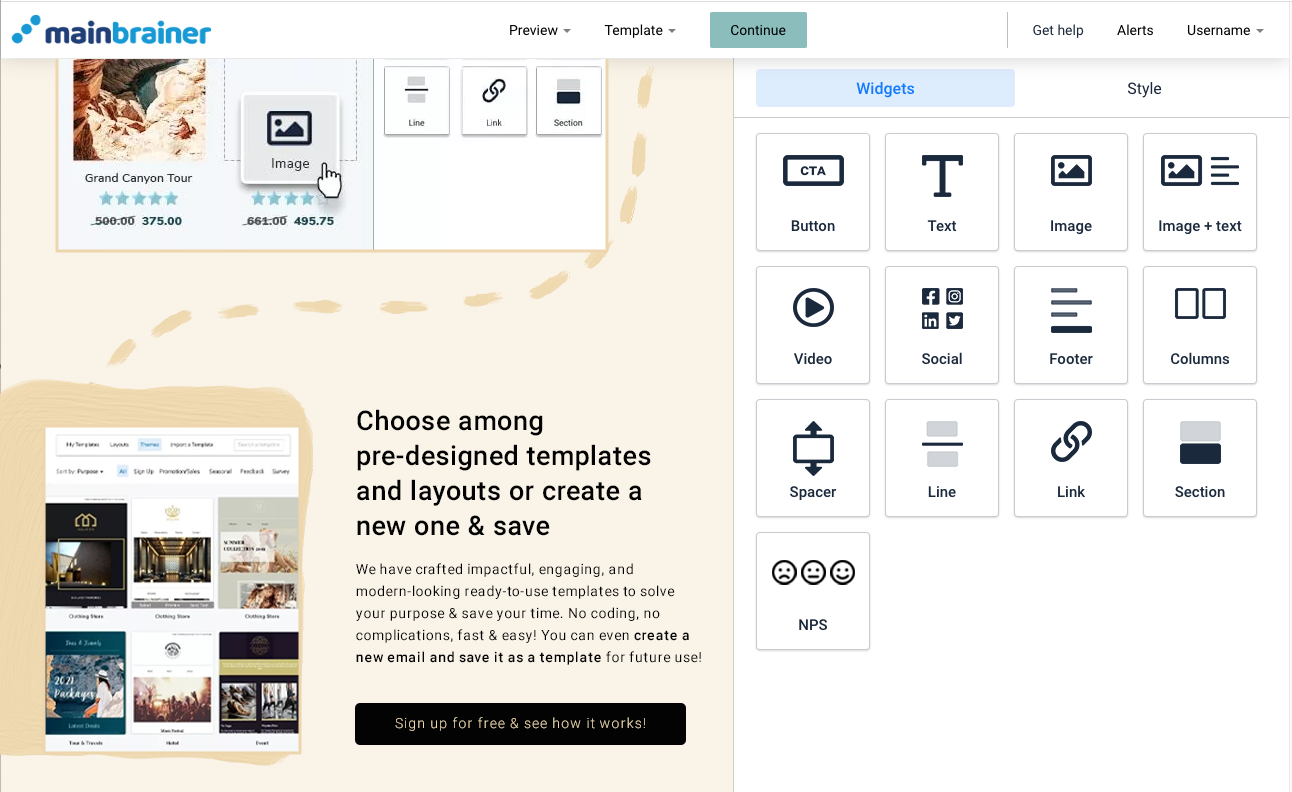
Drag and drop the widgets corresponding to the functional elements that you want to add to this Section, for example, a Text widget, a Button widget, an Image widget, etc.
For example, in the campaign shown in the screenshot below, we first added a Column widget to divide the Section into two columns. We then added an Image widget to the left column, and Text, and Button widgets to the right column.
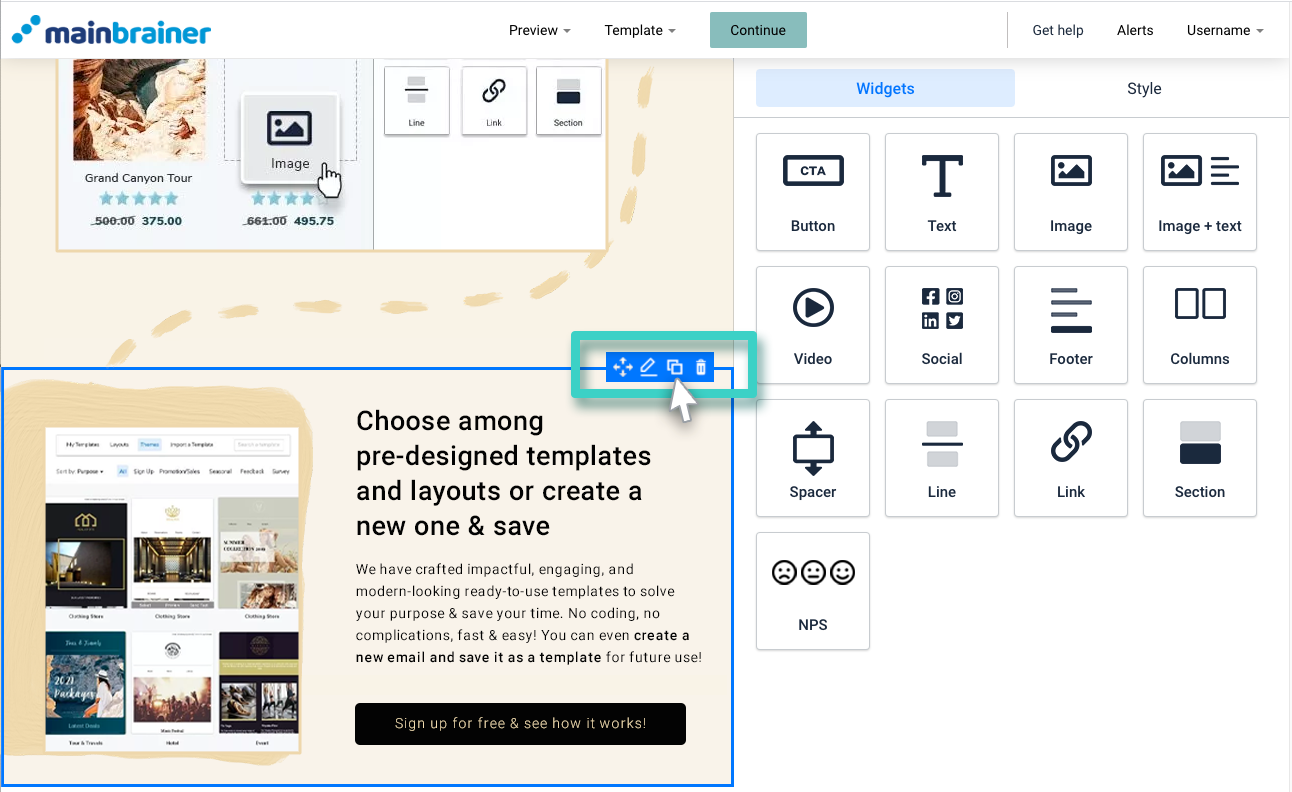
As explained in the widget introduction, a Section is a distinct content block in the Email that can be moved or copied as a whole.
For example, if you duplicate the Section widget (as highlighted in the screenshot below), a copy of the Section will be created along with the widgets it contains:
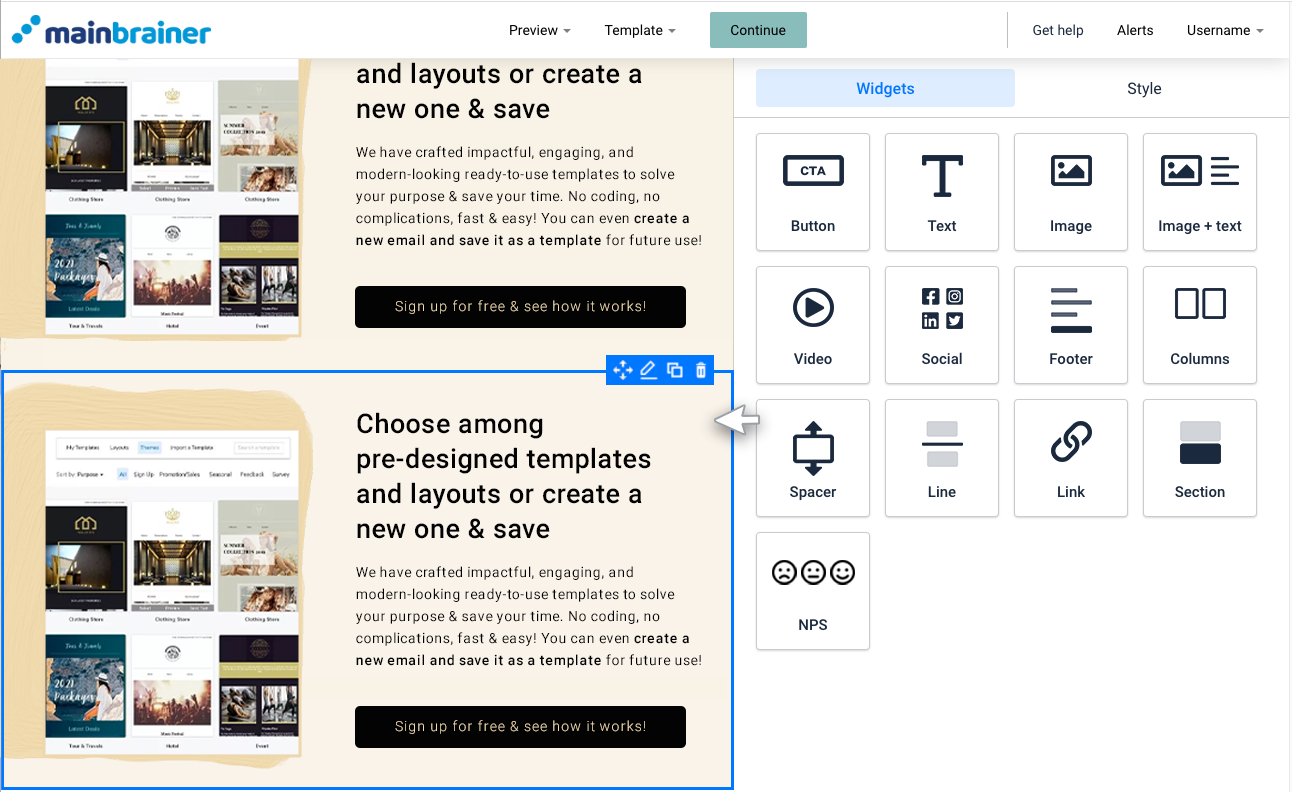
And that’s it! You have successfully added a content section to your Email campaign.
Let’s proceed and look at how to add an NPS survey form to your Email campaign using the NPS widget.
