The Map widget helps you add a map to your landing page. Using this widget, you can mark up to 5 addresses on the inserted map. Also, you can use it to add roadmaps/satellite maps/terrain maps or hybrid maps.
How to use a Map Widget in a Landing Page?
Step 1
Navigate to the landing page builder
Use the Main Menu on the left to create a landing page and subsequently navigate to the landing page builder.
Step 2
Add a Map widget to your landing page
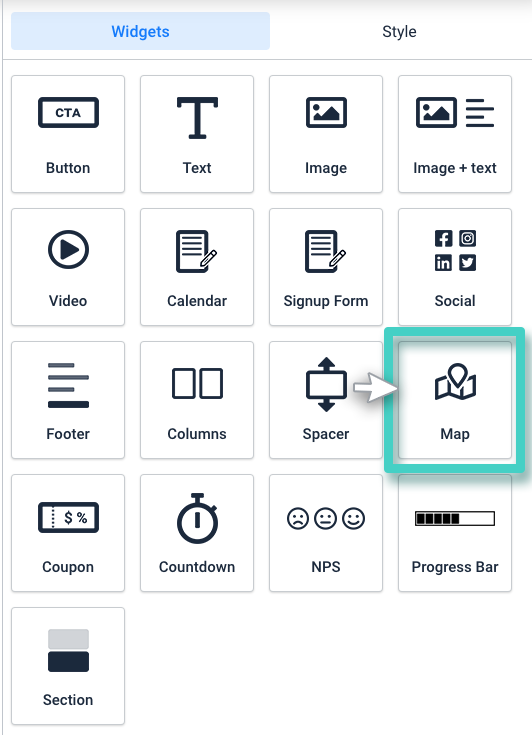
The blank area on the left is the Work area where you design your landing page, and the area on the right is the tools area where all the available design elements are displayed as Widgets.
In order to add a map to your landing page, drag and drop the Map widget to the work area (as highlighted in the screenshot below).
Step 3
Use the Settings tab to mark an address on the map
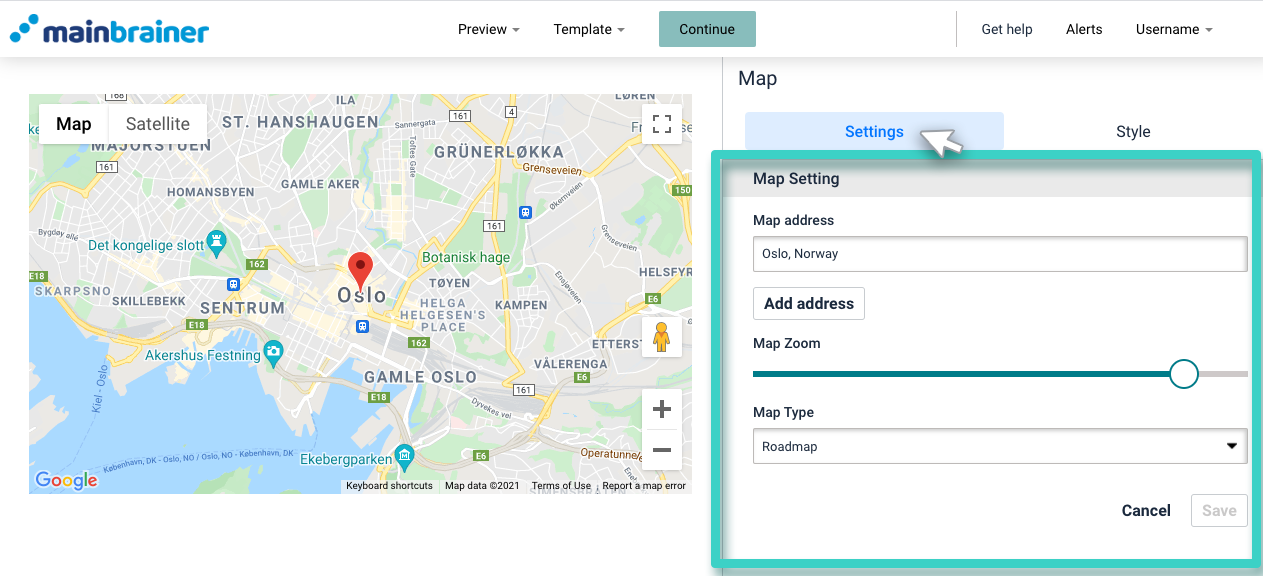
As you drop the widget into the work area, the widget Settings are displayed on the right (as highlighted in the screenshot below).
Herein:
- Use the Map address field to type in the address that you want to mark on the map widget and press enter. A marker corresponding to the added address will appear on the map.
- Use the Add address button to add additional addresses to the map. You can add up to 5 addresses on a map widget.
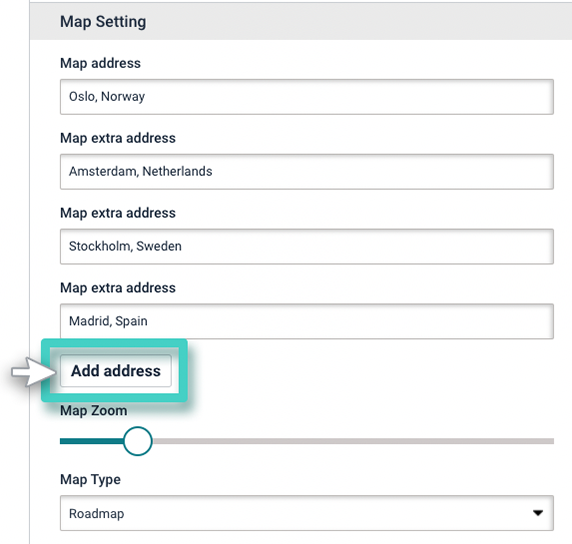
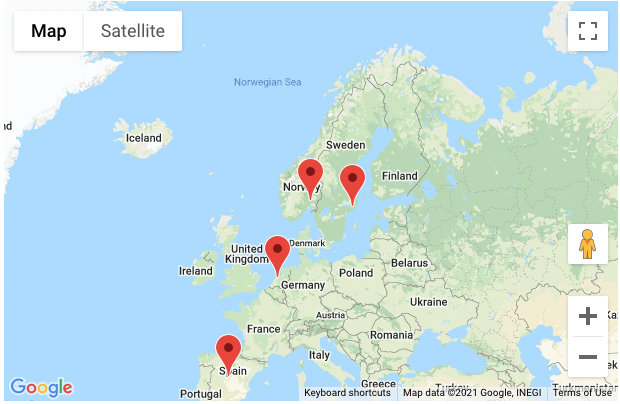
The added addresses will be marked on the map widget as shown in the screenshot below:
- Use the Map Zoom slider to adjust the zoom level of the added map.
- Use the Map Type drop-down to select the type of map you want to add to your landing page:
- Roadmap is a basic map version, generally used for marking locations, routes and voice navigation, etc. It is also the default map type.
- Satellite maps give the real view of an area and show how a place would like from a satellite.
- Terrain maps are physical maps based on terrain information. These are color-coded maps that help in identifying the terrain type of the area.
- Hybrid maps display a mixture of the road map view and satellite view of an area.
Step 4
Style your Map widget as per your design preferences
You can edit the appearance of your Map widget using the options available under the Style tab (as highlighted in the screenshot below).
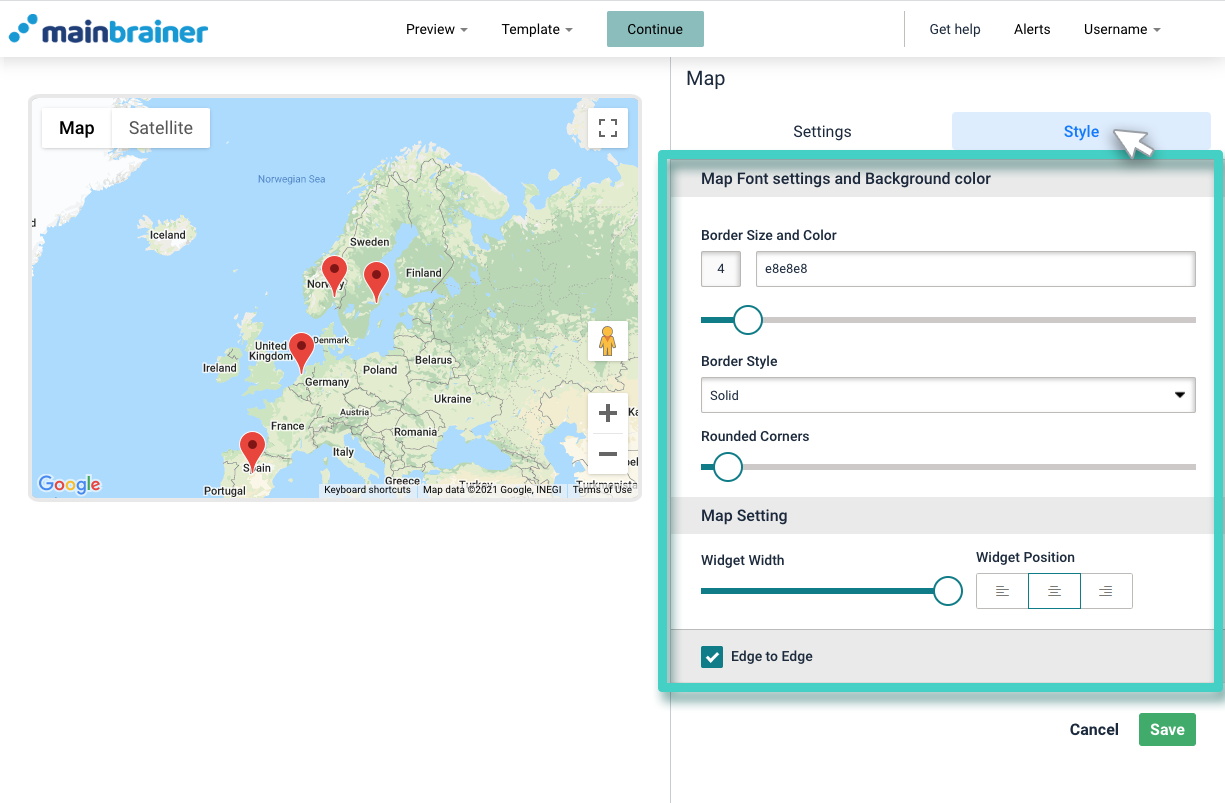
Under the Style tab, the different design options available are:
4.1 Font settings and Background color
- Border Size and Color:
- For changing the color of the widget border
- Sizing bar to change the width of the widget border
- Border Style – Use this dropdown to change the border style
- Rounded corners – Use this sizing bar to add rounded corners to the map widget.
4.2 Map Setting
- Use the Widget Width sizing bar to adjust the width of the map widget
- Use the icons available under Widget Position to change the alignment of the map widget in the design
Click Save, and that’s it!
You have successfully added a Map to your landing page!
Let’s proceed, and have a look at how to add a discount Coupon to a landing page using the Coupon Widget!
