Step 1
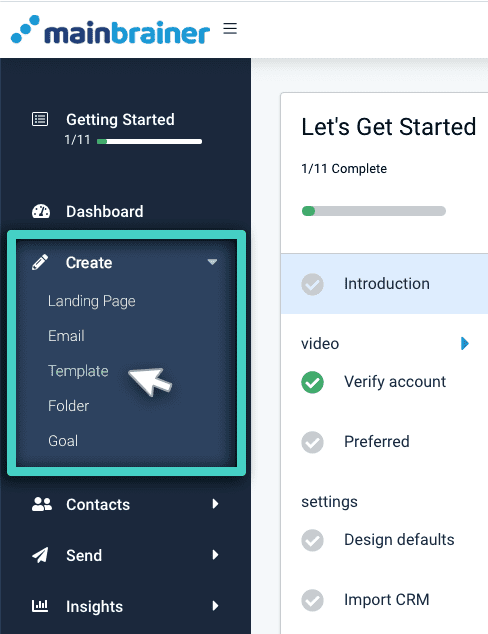
Use the Main Menu on the left to expand the Create menu and click Template.
Step 2
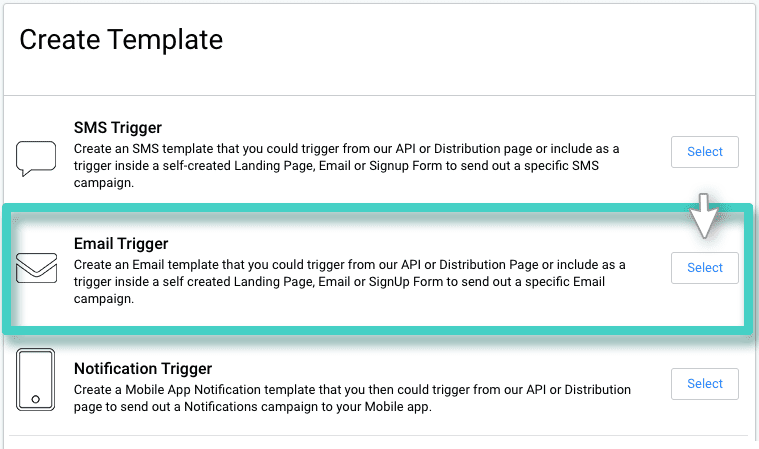
The subsequent screen lists the different Templates that can be created in MainBrainer. Select the Email Trigger Template option (as highlighted in the screenshot below).
Step 3
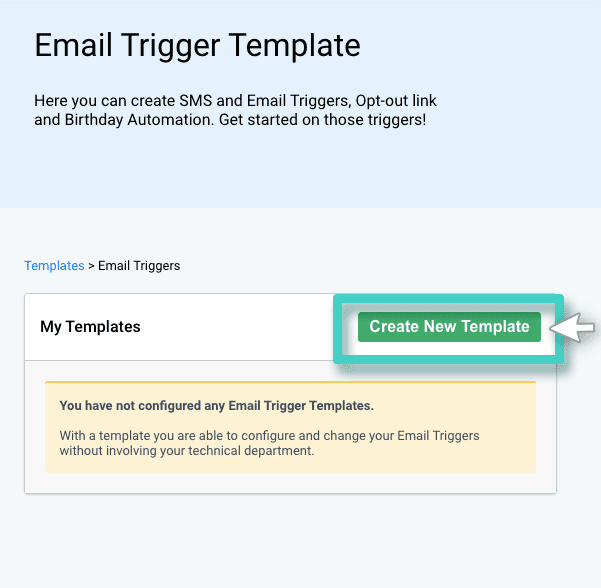
The subsequent page lists all the Email Trigger Templates created so far. You can edit a previously saved Template by using the Edit button displayed against each listing, or you can create a new Template from scratch by using the Create New Template button (as highlighted in the screenshot below).
Step 4
Type in a relevant Template name and description, and click Continue. The Template name and description are only for your reference purpose. It is not visible to your customers in any way. Feel free to make it as descriptive as you want, as it would make Template identification easier in the future.
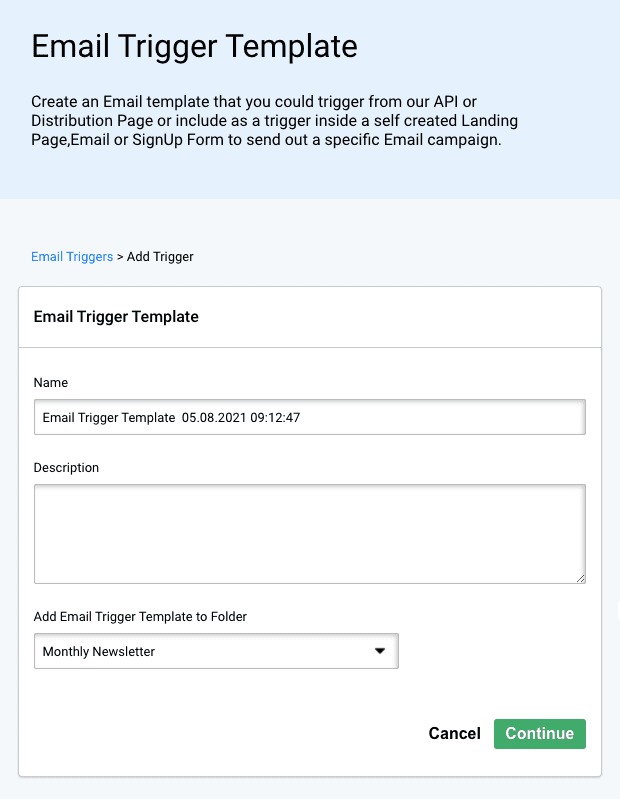
If you choose not to enter a Template name, the platform assigns a default name to the Template with the following structure:
<Email Trigger Template Creation date Creation time>
For example: Email Trigger Template 30.07.2021 10:00:00
Step 5
Use the area shown in the screenshot below to enter the Email Sending details:
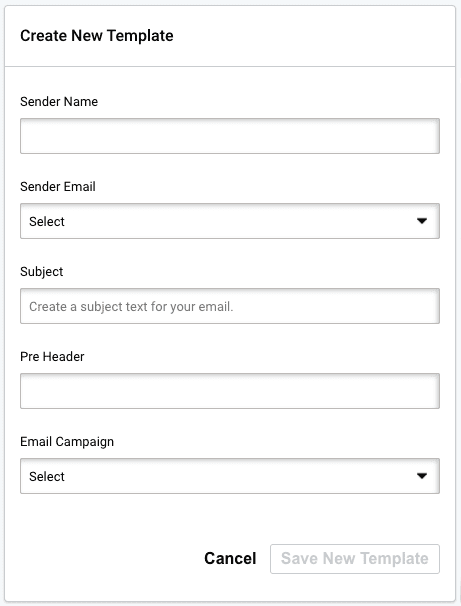
- Sender Name – Use this dropdown to select the Sender Name for this Email Sending.
- Sender Email – Use this dropdown to select the Email address you would like to display as the sender for this Email Sending. By default, you can only send Emails with noreply@mainbrainer.com as the sender Email address. In case you would like to add a custom sender Email, write to us at support@mainbrainer.com.
- Subject – Use this field to enter the text you want to display as your Email’s subject.
- Preheader – Use this field to enter the text you want to display as your Email’s preheader, i.e., the
summary text that follows the subject line. - Email Campaign – Use this dropdown to select the Email campaign that you intend to send.
Click Save when done.
Suggested Reading: How to use Email Trigger Templates?
