Step 1
Navigate to the CRM
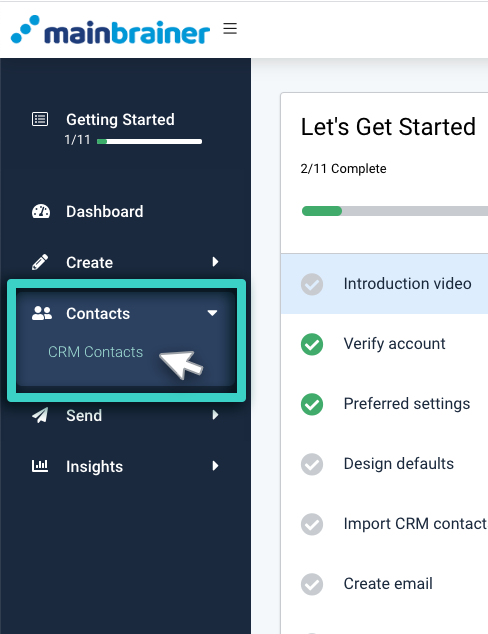
Use the Main Menu on the left to expand the Contacts menu and click CRM Contacts.

Step 2
Create a new List
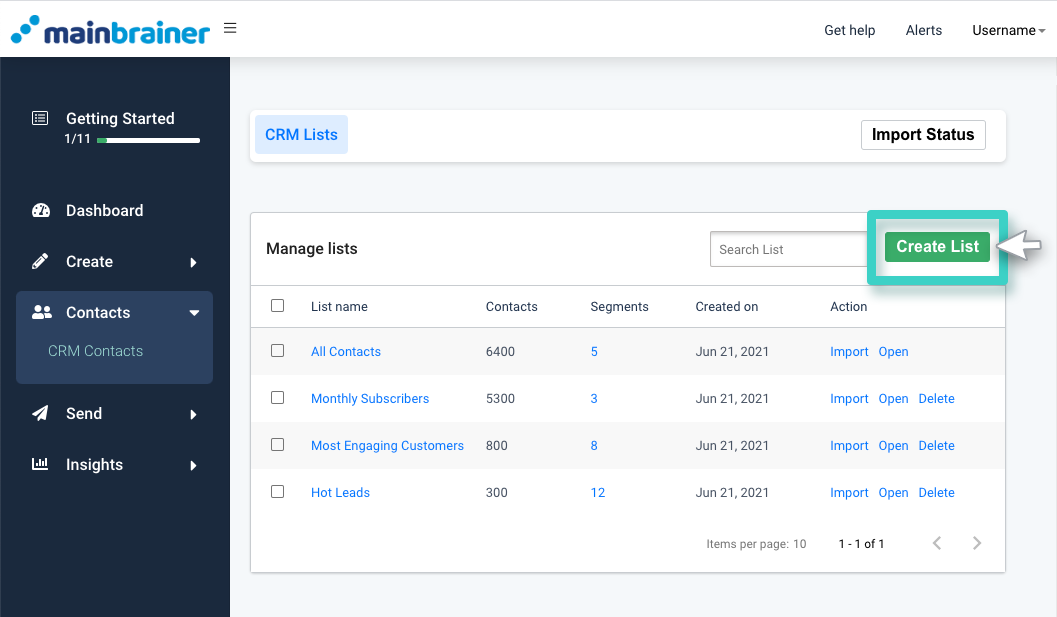
The subsequent page displays all the contacts lists created to date in your MainBrainer account. Click the Create List button to create a new contact list (as highlighted in the screenshot below).

Step 3
Name your CRM list
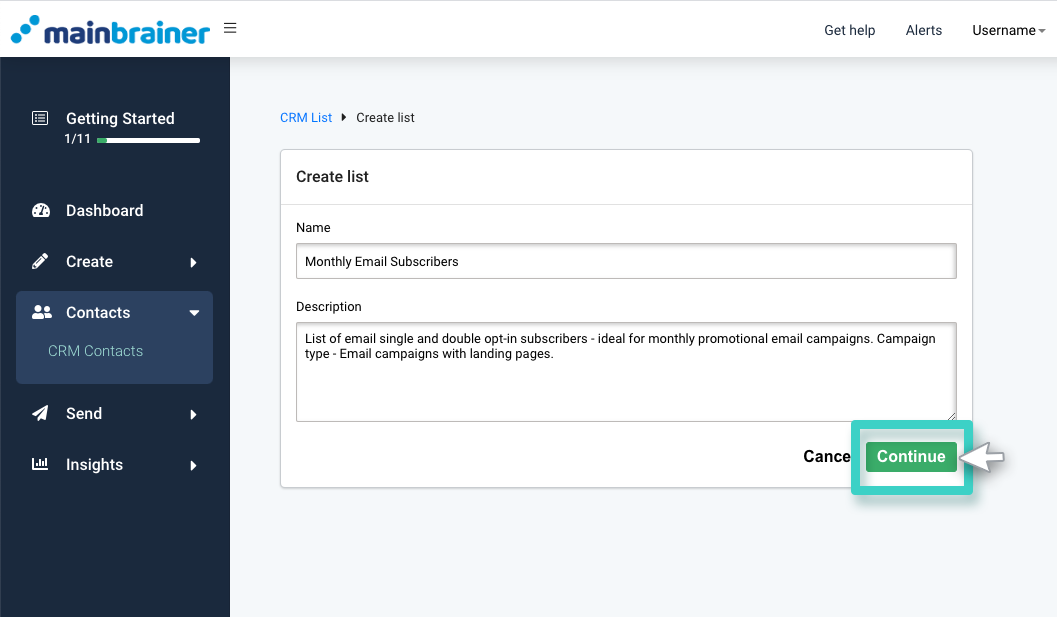
Give your contact list a relevant name and description.
- Name: Use this field to name the list as you deem appropriate.
- Description: Use this field to add a relevant description for this contact list. This description is purely for your reference and to help you search for and identify this list later.
Once you have entered the above details, click Continue (as highlighted in the screenshot below).

Next, you will be prompted to add contacts to the newly created list by uploading a CSV file.
Note: You can import contacts into the newly created list immediately or later as per your convenience. As soon as you click the Continue button as explained in this step 3, the list will be created and displayed on the CRM Contacts page.
