Now that you have created your first Email Campaign, it’s time to send it to your customers and let it work its magic!
You can either send the campaign right away or schedule the sending for a later date/time.
In this article, we guide you through the Email sending process step-by-step:
Step 1
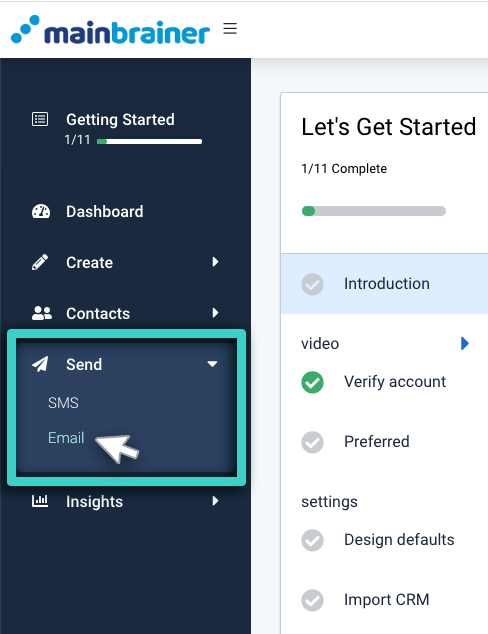
Navigate to the Email sending screen.
Using the Main Menu on the left, expand the Send dropdown menu and click Email.
Enter a relevant name and description for this sending on the subsequent screen. Note that this name and description will only be visible to you and will be used to display the list of scheduled sendings on your Dashboard. Your customers will not see this, so make it as informative as you want. It will make sending identification easier in the future.
Click Continue when done.
Step 2
Choose your Email recipients
This screen displays all the contact lists created in the MainBrainer CRM. In case you haven’t imported your contacts to the CRM yet, create a new List and import your first set of contacts. Then, use the checkboxes under the Action tab to select the contact list(s) to which you wish to send the Email campaign.
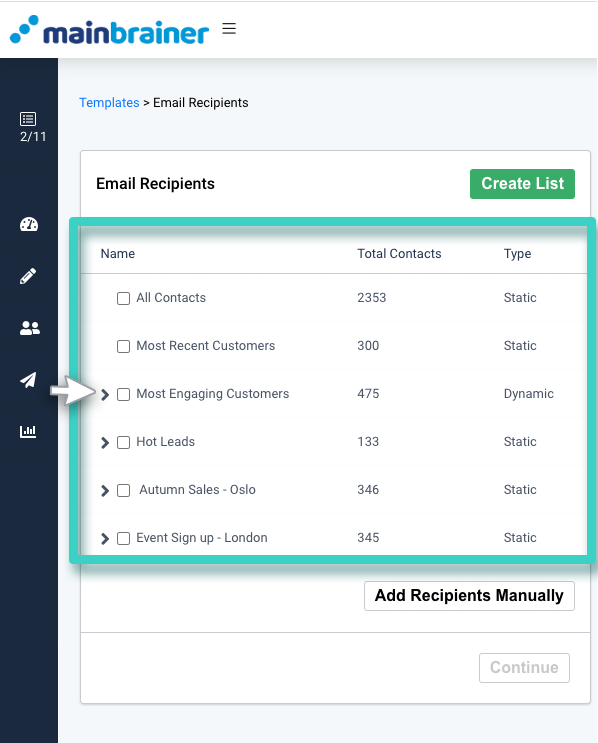
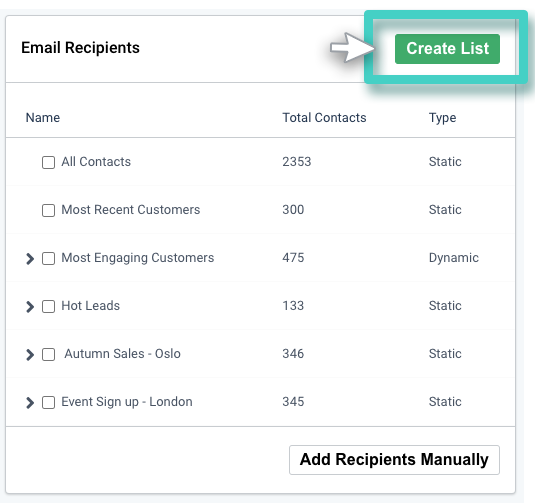
If you would like to create a new list with a different set of contacts, you can do so by clicking the Create List button.
If you would like to add the recipients manually, click Add Recipients Manually (as highlighted in the screenshot below).
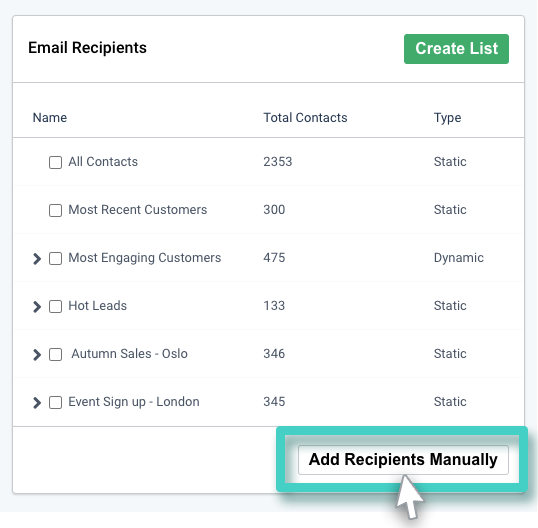
As you click the Add Recipients Manually button, the following section appears:
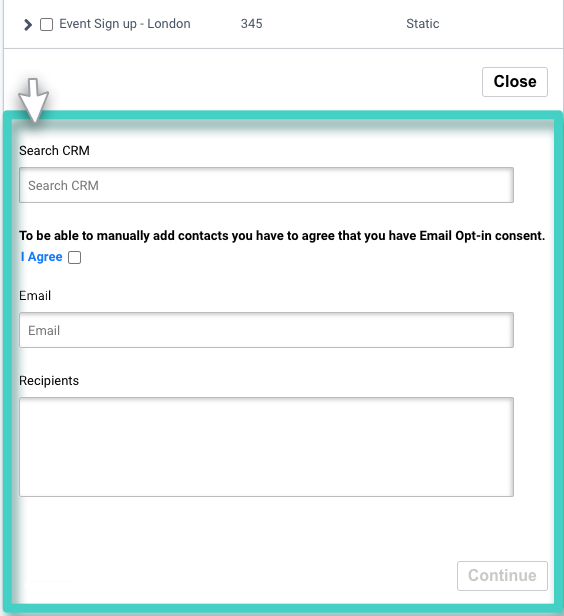
In this section, use the fields:
- Search CRM to search the CRM for a contact that already exists in the CRM. You can search for the intended contact by entering either the name or the Email address in the search field. Select the intended contact from the dropdown.
- If you need to add contacts manually, first make sure you have Email Opt-in consent and then check the I Agree checkbox.
- Email to enter the Email address of the intended recipient and click Add.
- Recipients to view the list of manually added recipients.
Note: All the contacts added here manually will also be added to the CRM with their Email opt-in status as Opted-in.
Click Continue when done.
Suggested Reading: What are single opt-in signups? What are double opt-in signups?
Step 3
Type in your Email Content
Use the subsequent screen to specify the Email campaign that you wish to send and the relevant sender details:
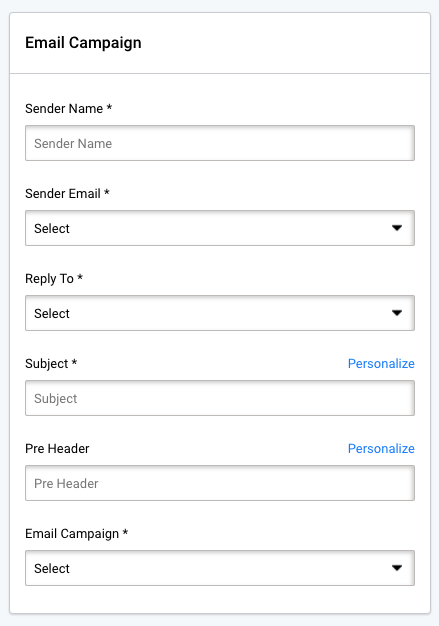
Herein, use the fields:
- Sender Name – to select the Sender Name for this campaign distribution. This name helps the Email recipients identify the sender of the Email.
- Sender Email – to select the Email address that you want to send the Email campaign from.
- Reply To – to select the Email address at which you would like to receive replies from this campaign’s recipients. Use the option Create New from the dropdown menu to create a new reply-to Email address.
- Subject – to enter the text that you would like to appear in the Email’s subject field. Improve your campaign’s open rate by adding a catchy subject line that prompts your recipients to open and read your Email.
- Pre Header – to enter in the text that you would like to appear in the Email’s pre header area, i.e. the area after the subject line. Try to add a summary of the campaign as a pre header. It gives your recipients an idea about what is inside the Email before even actually opening it.
- Email Campaign – to select the Email campaign that you wish to distribute.
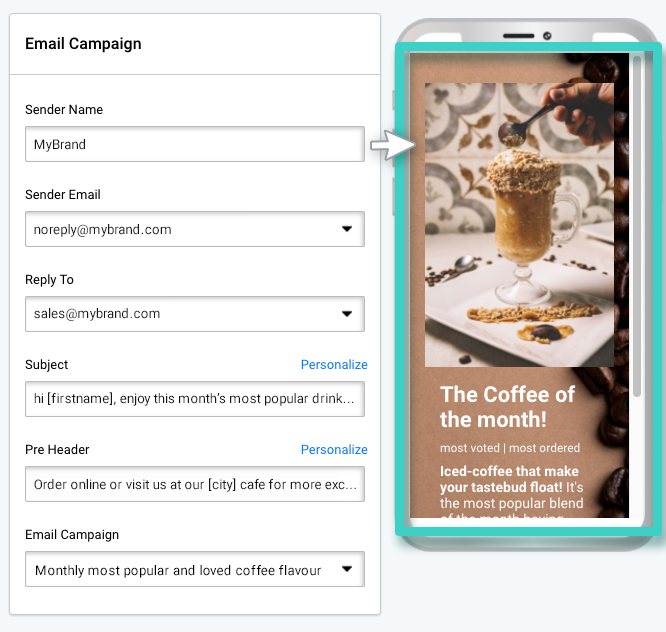
As you select the Email campaign, a preview area opens on the right side (as highlighted in the screenshot below). This area displays the Email as it would appear in your recipients’ inbox.
Step 4
Send Options
Use the Send Options section to send your Email campaign or schedule a sending for a later date/time.
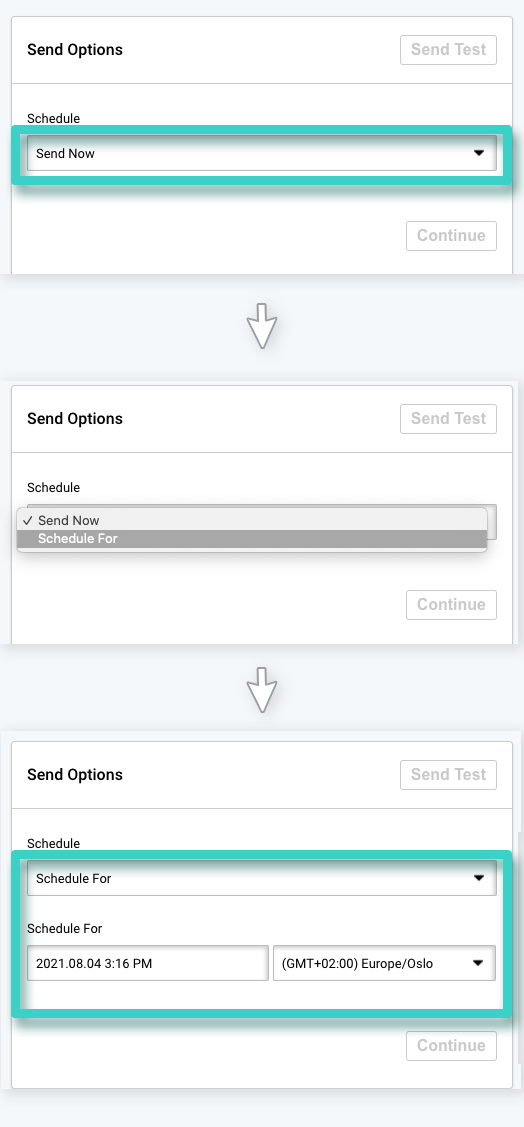
- use the menu option Send Now to send your Email campaign immediately, or
- use the menu option Schedule For to schedule your Email campaign sending for a later time/date.
Step 5
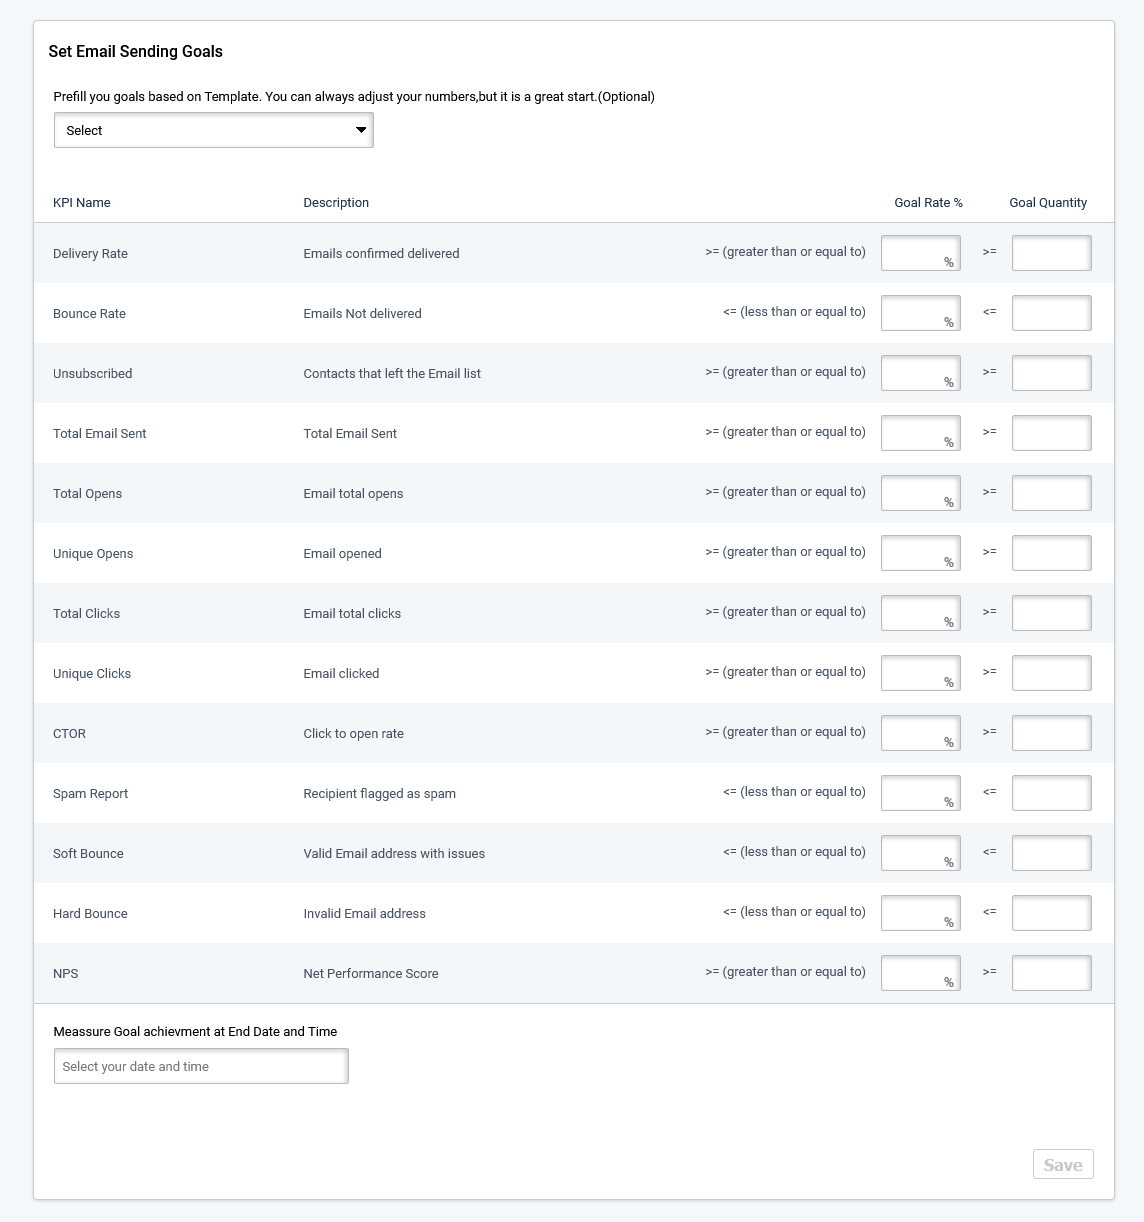
Set Goals for your Email sending
You can set goals (i.e., performance targets) for your Email sending on the subsequent screen. Though highly recommended, this step is optional. If you decide to skip goal setting at this stage, you can also set goals for your Email sending later.
Step 6
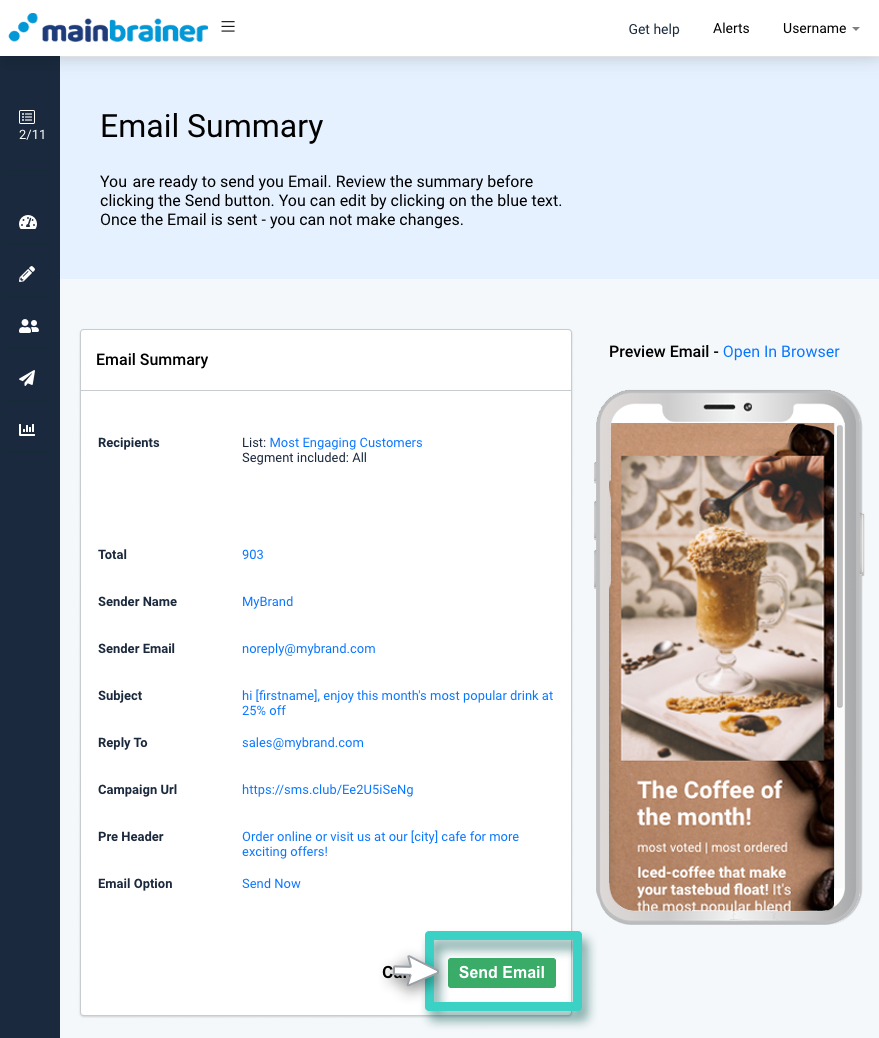
Review the Email Summary and Send your Email Campaign!
The next screen displays a summary of all the options chosen in the previous steps. Review the summary to ensure that everything is perfect and looks as intended, and click Send Email to send your campaign!
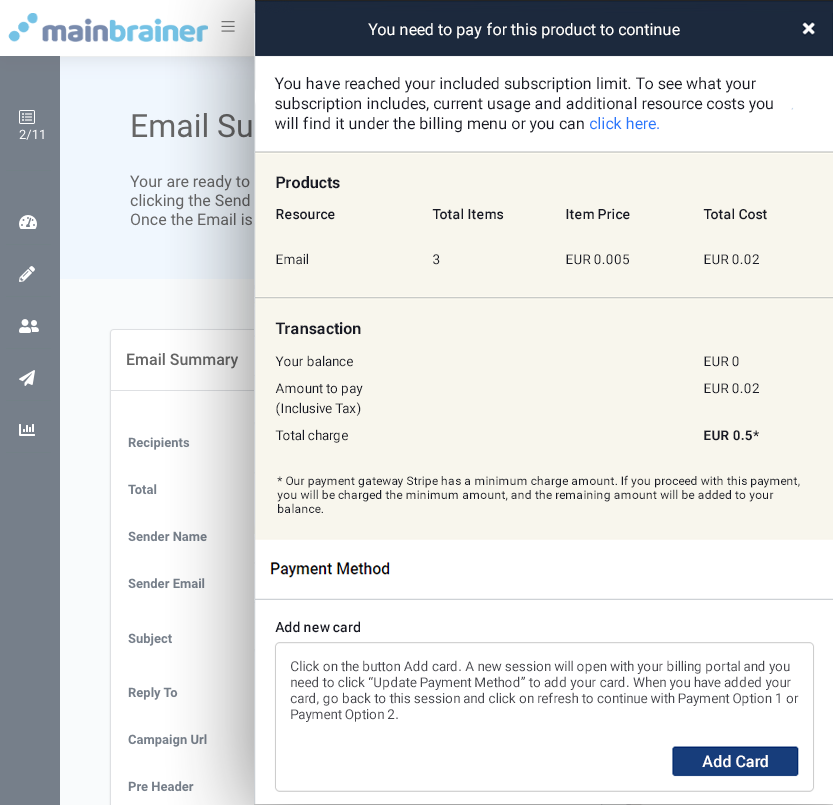
Note: In case you attempt to send more Emails than are permitted in your subscription plan, and you have insufficient funds in your account to pay for the additional Emails, the sending will not be executed. In such cases, use the sidebar to add necessary funds to your account balance.
Suggested Reading: What happens when you need to use more resources than your subscription quota?
