Creating your own survey has never been easier! With our Survey creator tool, you can create precise and effective surveys within a short span.
Check out our video demonstration to understand how.
Step 1 – Create a new survey
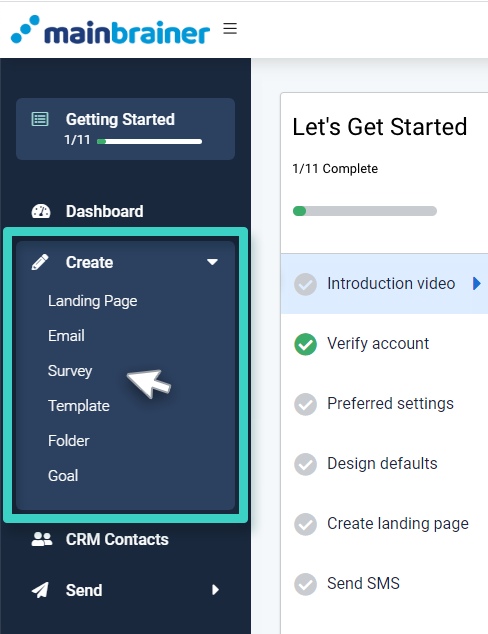
The Main Menu on the left of the screen shows a Create menu. Expand it and click on Survey.
Once you click, you’ll be redirected to the Survey Page Manager. It will show all your survey pages (since this is your first survey, this space will appear empty). Now click on the Create Survey button on the right hand side to get started.

Step 2 – Name and description of your Survey.
Give your Survey a valid name and add a description. You can also choose to keep the default name and click Continue.
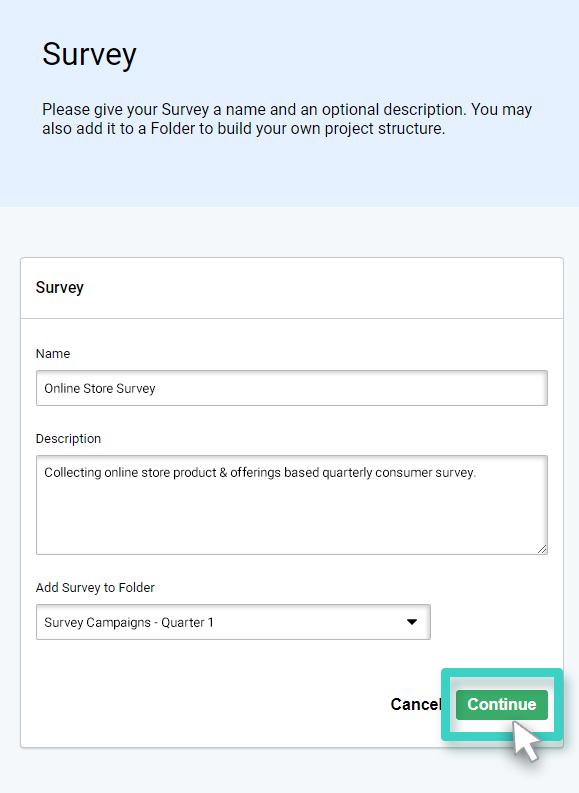
Here are the fields:
- Name: Use this field to give your survey a relevant name.
- Description: Use this field to write a valid description for the current survey. The description could be anything describing your survey form – for example, a survey to understand if people opt for Android or iOS and why. Or, to find out if men prefer casual shoes over formal shoes and why. Or, employee happiness at workplace surveys.
This description is not visible to your customers in any way and is purely for your reference. Please feel free to make it as informative as you like, as it will help you search and identify this survey later.
- Add survey to folder: Use this dropdown to select the folder to which you would like to add this survey. While adding your survey to a folder is optional, we recommend that you always group and organize similar surveys in Folders. In case, you don’t want to pick a folder, you can simply click Continue.
Once you’ve entered these details, click Continue.
Note: If you choose not to enter a survey name, the platform assigns a default name to the survey with the following structure:
For example: Survey 30-07-2021 10:00:00
Step 3 – Select a template or layout
My Templates contain all the surveys that you previously saved as templates. Since this is your first survey, this section will appear empty. Once you start creating surveys, you can save your survey designs as templates for future use.
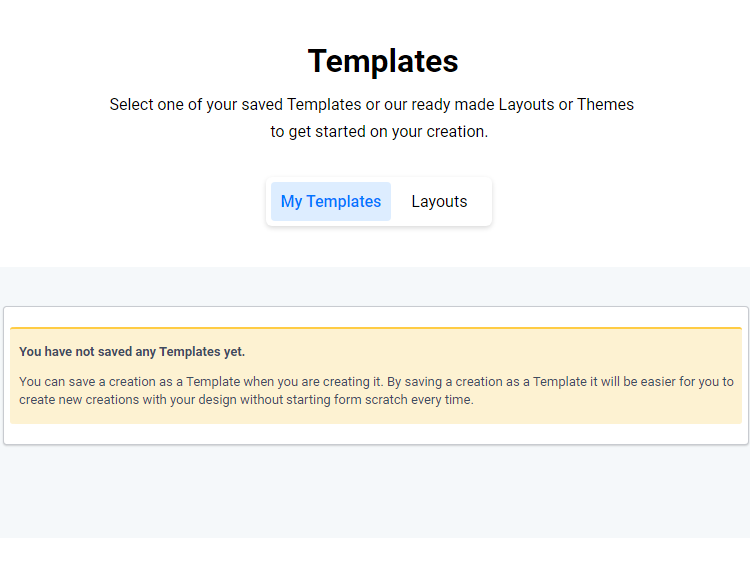
For now, click on the Layouts and select the blank template and start with an empty page to design your first survey.
Step 4 – Design your Survey
You can now see the Survey Design area with a blank space on the left-hand side and your tools on the right-hand side.
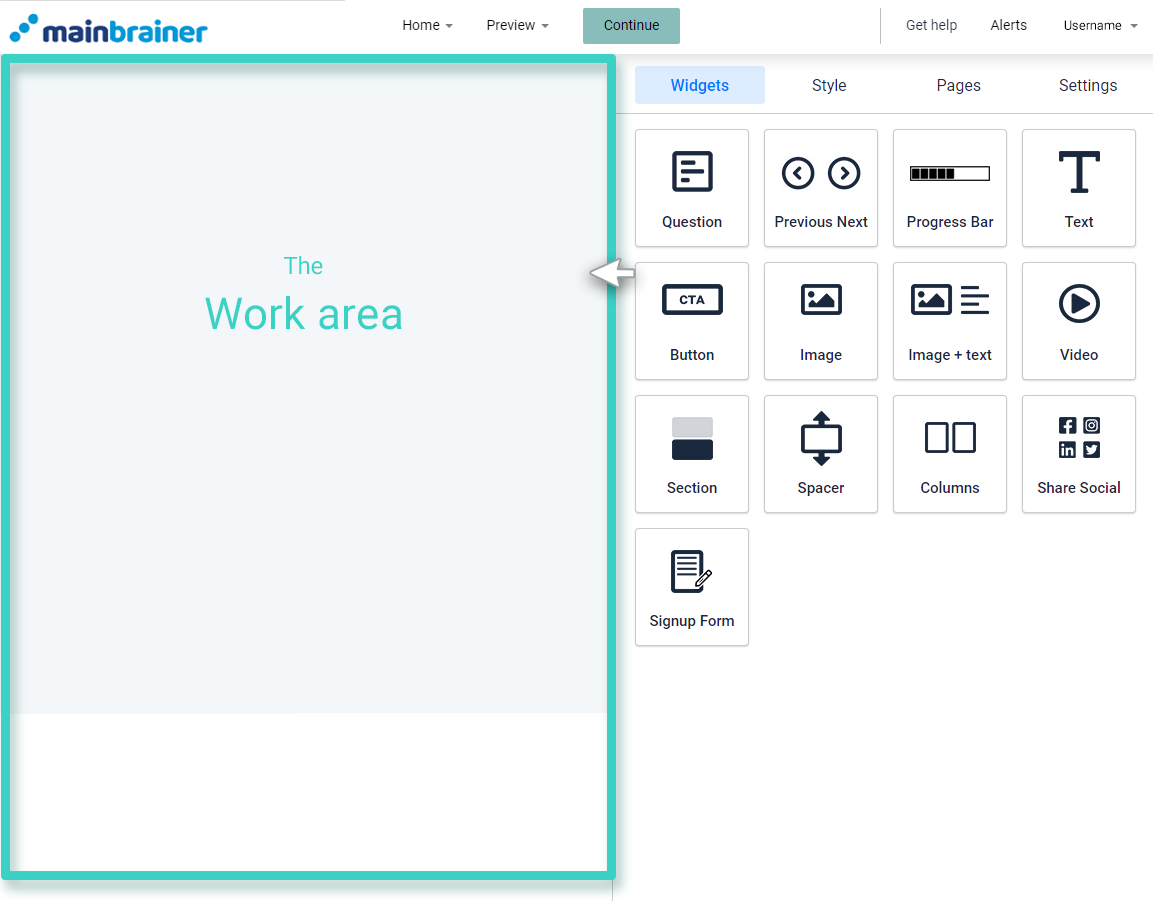
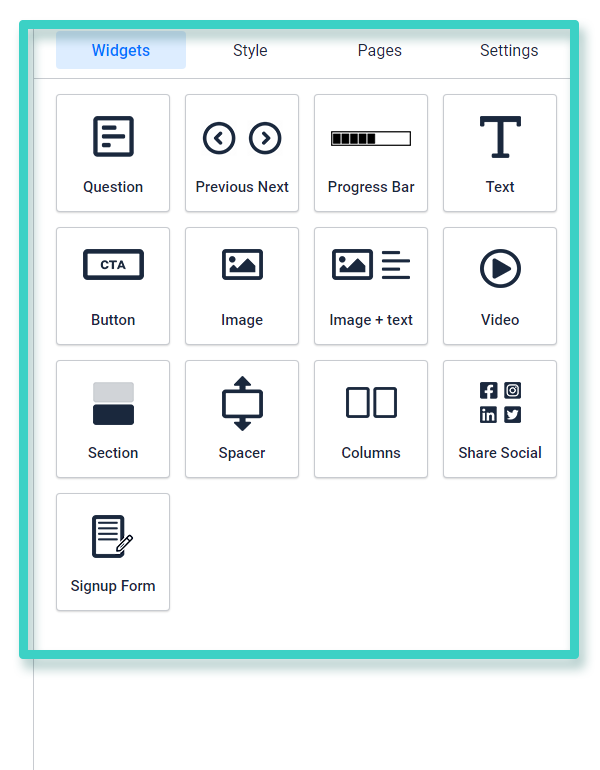
The tools contain:
Widgets: Design elements like Question box, Progress bar, CTA Buttons, Images, etc. You can either click or drag-and-drop each widget to design your survey.
Style: Page dimensions, background color, and image, etc.
Pages: Add as many pages in your survey as you want. Home is a default first page and you cannot delete it but you can edit the page name. Click here to understand pages.
Settings: Includes categories for questions. You can define several categories here and assign different questions to them. For example, you can define a category “Personal Information,” and assign all the questions in your survey under this category, like Gender, Marital Status, etc.
You will find more information about the Settings and Style tabs in each specific widget help article.
Step 5 – Preview your Survey
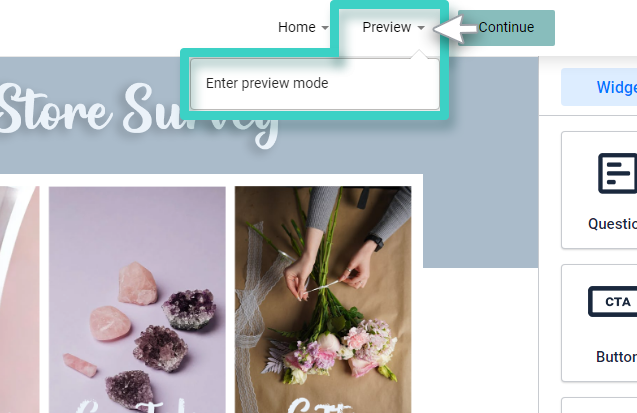
Once you have designed your survey, click on Preview and then “Enter Preview Mode.” You can see how your survey will appear to your recipients.
Step 6 – Activate your survey
Once you have designed your survey and are satisfied with it, click Continue.
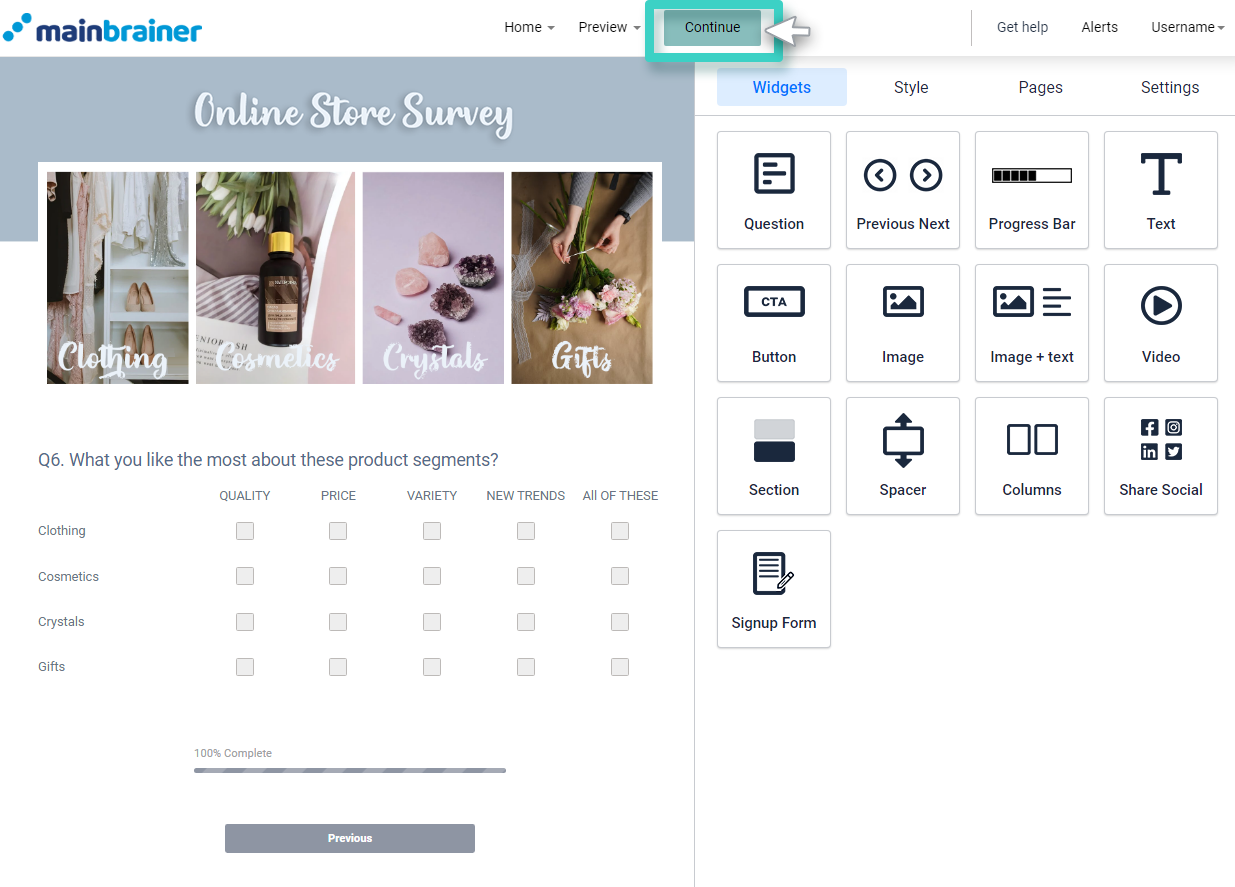
The page redirects you to the “Create Survey URL” page. Here, you can pick the Domain in the drop-down option and edit the Slug name. By default, the UI picks the survey name as the slug but you can edit this if you want.
The UI will show you the Preview of the URL below.
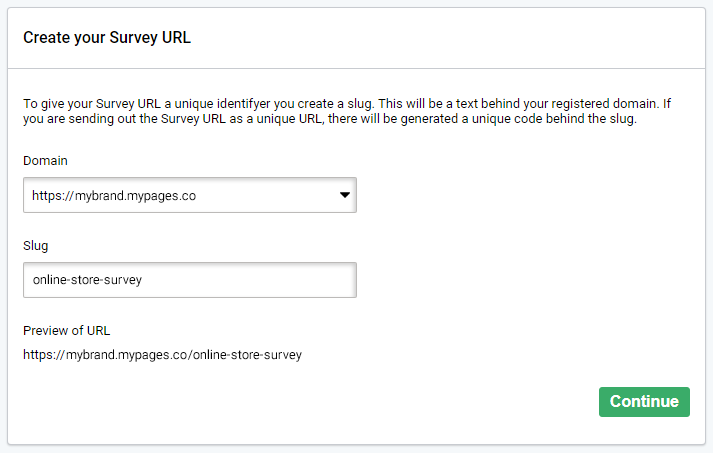
Note: By default, the UI assigns your company name and ID as the domain in the URL. If you want, you can configure and whitelabel your landing page URLs, emails or URL shorteners with us. Once you whitelabel your URLs, the domain will list them all for you to select. To understand more about how to whitelabel your URLs, click here.
Click Continue when you’re satisfied with the URL. The page redirects you to the Survey Manager. And before you can send your survey to your contacts, you need to activate your Survey. Click on the Activate button to do so.
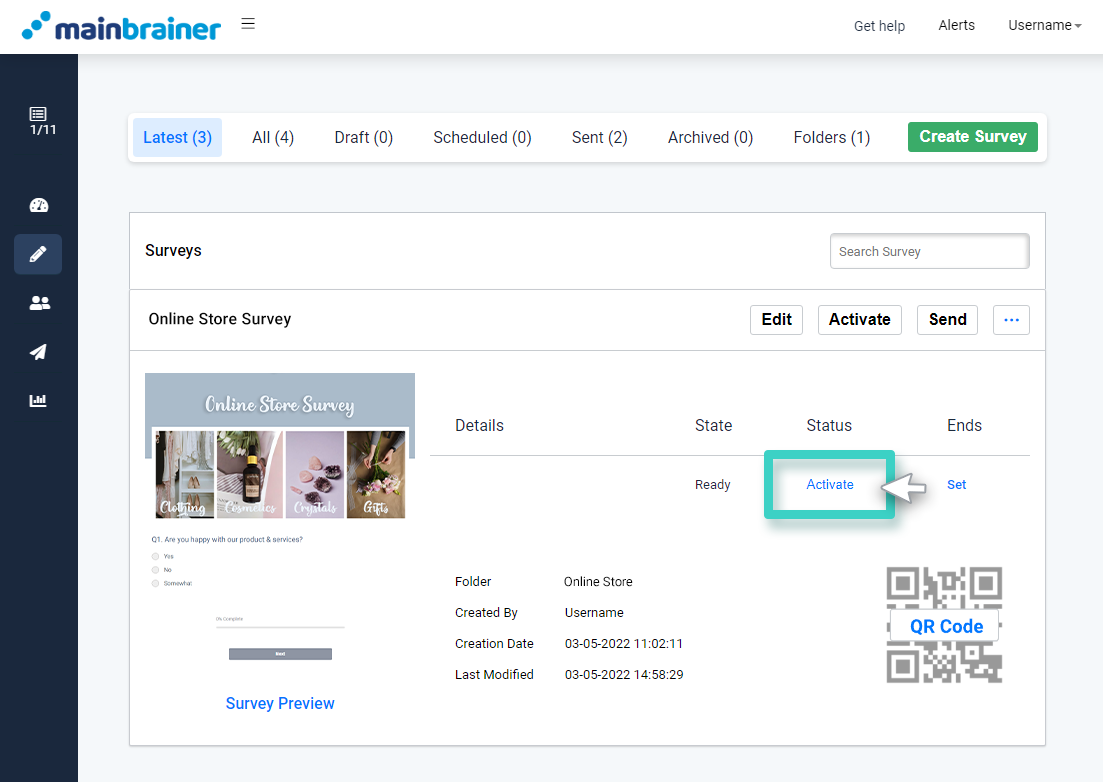
Activate > Set Activation Period > Watermark Text > Remove Watermark
Voila! You have successfully created your first survey.
Feel free to play around with our Survey Creator Widgets and keep designing potent surveys.
