While we recommend that you set goals for your campaigns at the time of sending, you can also set conversion goals for the Email campaigns sent in the past.
Note: You can only set goals for those sendings for which no goals were set at the time of sending/scheduling.
Also, when you set goals for a previously sent campaign, goal performance is evaluated using the data beginning from the moment the campaign was originally sent to the current time.
How to set Email Conversion goals for previously sent Email campaigns
Step 1
Create a New Goal
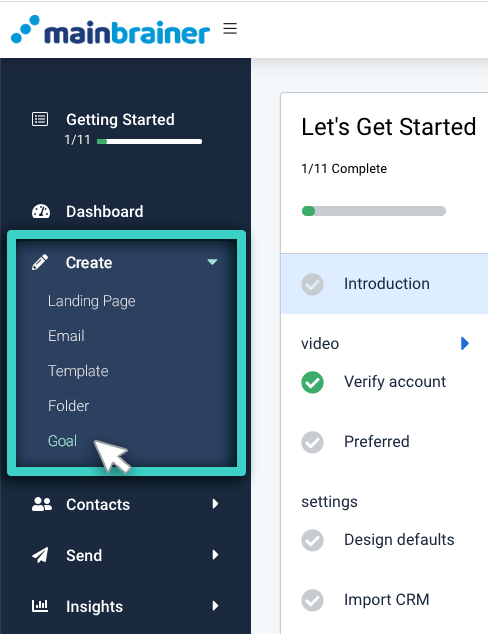
Use the Main Menu on the left to expand the Create menu and click Goal.
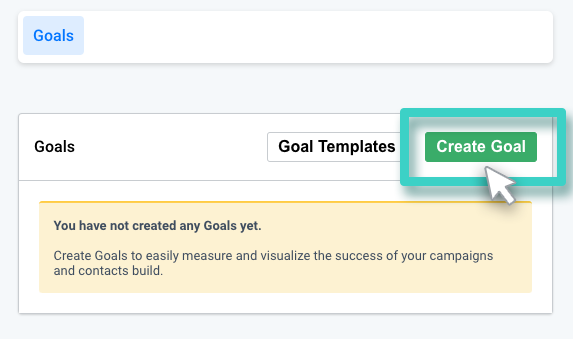
The next screen will list all the goals created so far. You can edit an existing goal or create a new goal. To create a new goal, use the Create Goal button (as highlighted in the screenshot below) and proceed to the next step.
Step 2
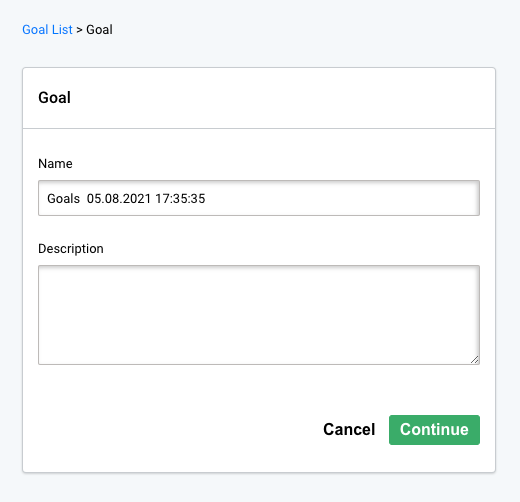
Give the Goal a Relevant Name and Description
This description is purely for your reference purpose. Your customers will not see this, so make it as informative as you want. It will make goal identification easier in the future. Click Continue when done.
Step 3
Select the Email Sending for Goal Setting
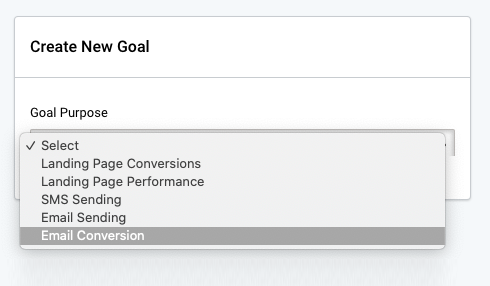
The Goal Purpose dropdown menu lists the different types of goals you can create for your campaigns. From this menu, click Email Conversion (as highlighted in the screenshot below).
From the subsequently displayed menu, select the relevant Email sending for which you wish to set conversion goals.
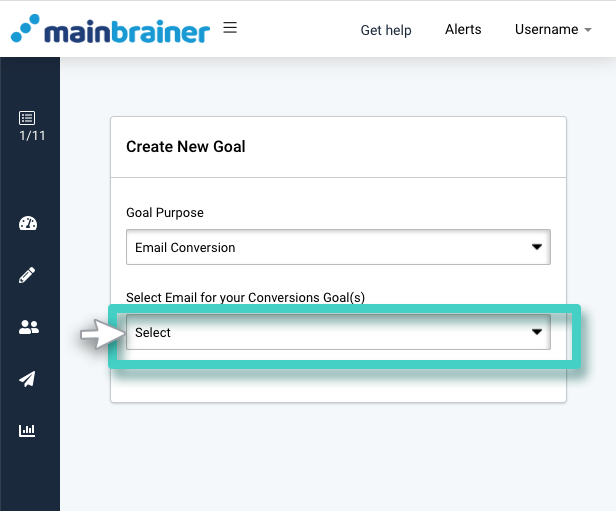
Note: In this menu, only those sendings are available for selection for which no goals were set at the time of Email sending/scheduling. To edit previously set Email sending goals, please use the Edit option displayed against a goal listing in the above-described Step 1.
Step 4
Enter Your Goal Parameters
As you select the Email sending, a list of all the widgets used in the Email campaign is displayed, along with the conversion goals that can be set for each widget.
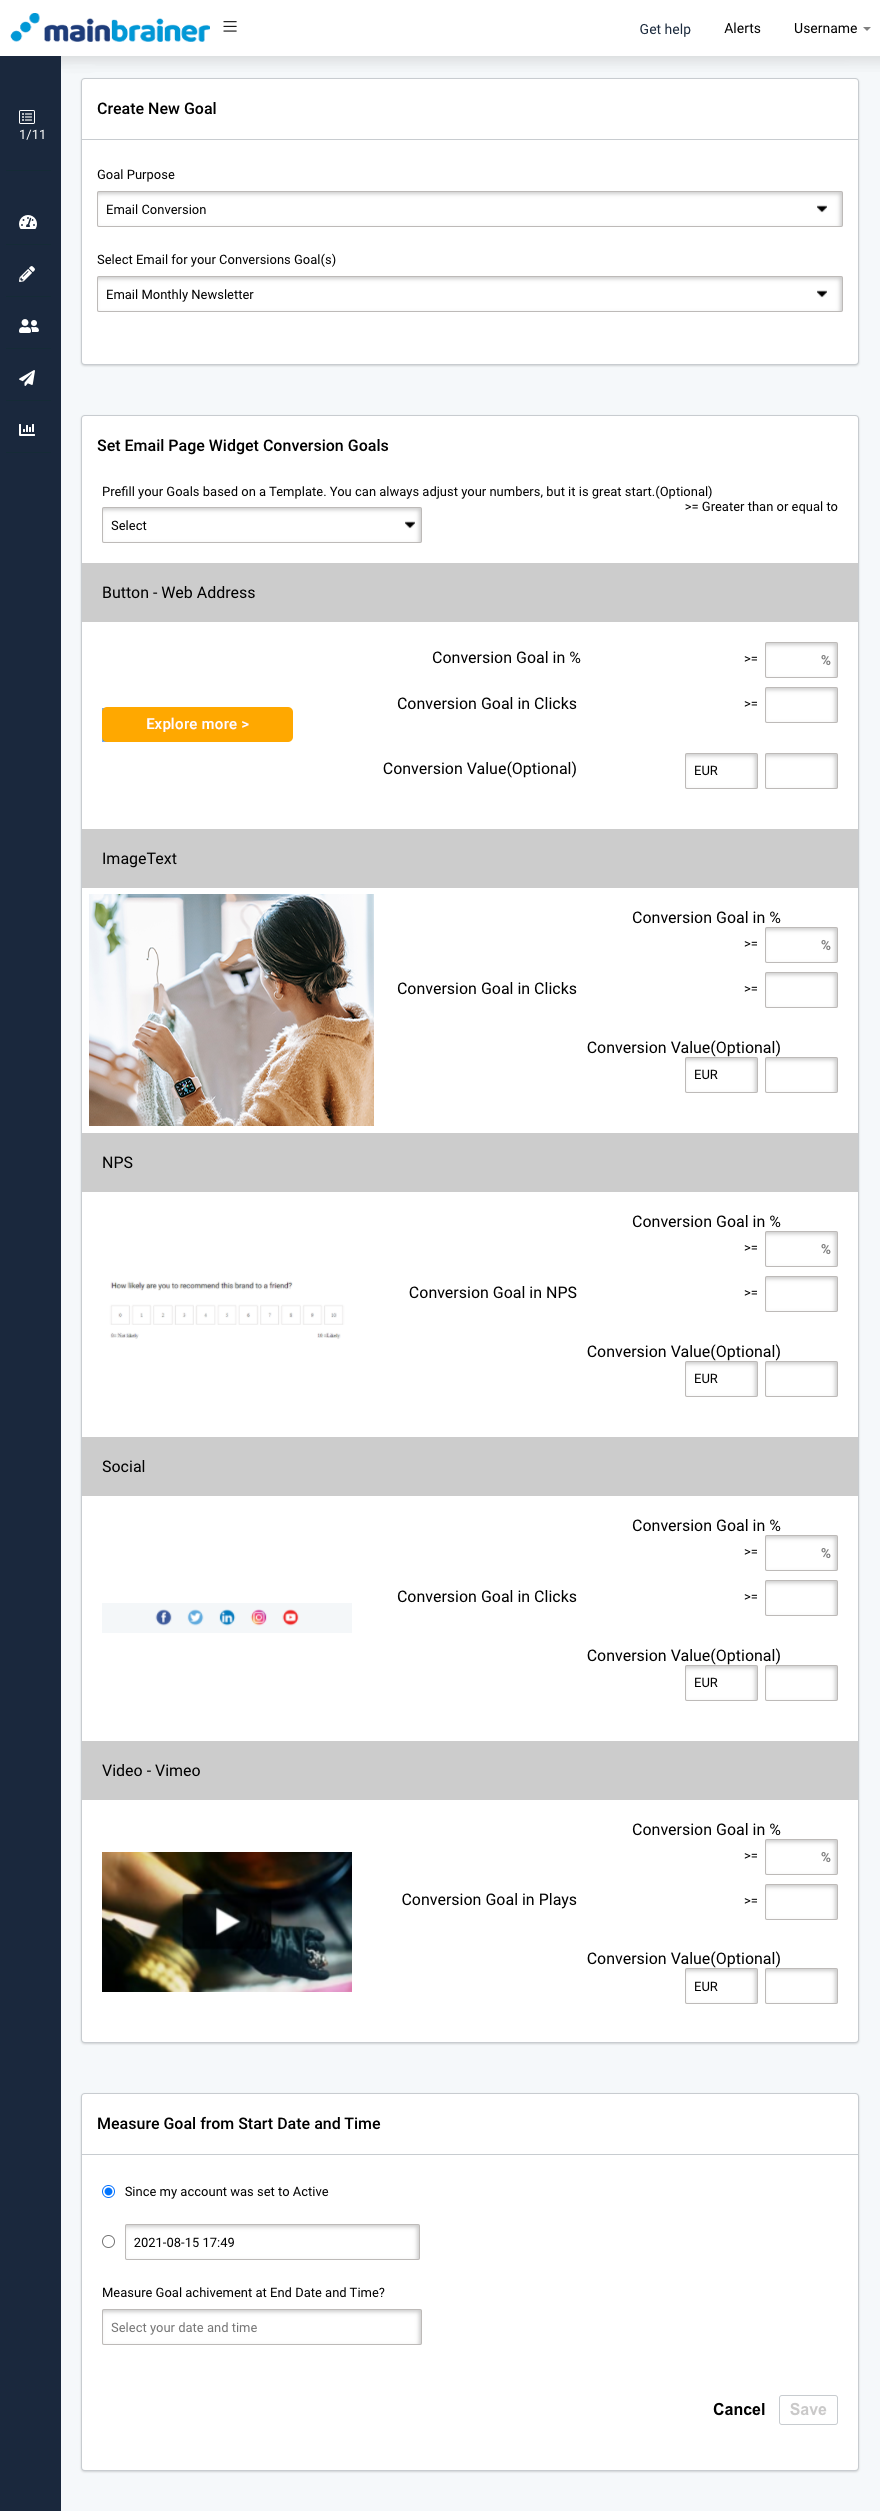
You can:
- Enter the KPI performance targets manually; Or
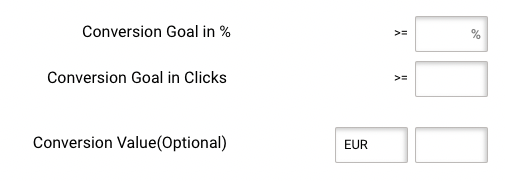
- Autofill the KPI performance targets using a pre-saved Goal template (as highlighted in the screenshot below). These templates are meant to serve as a starting point. You can always edit the entries as per your requirements.

Note that you can either enter the goal parameters in percentages or as absolute values.
Specify the start and end dates between which you want to measure the performance of the Email campaign, and click Save.
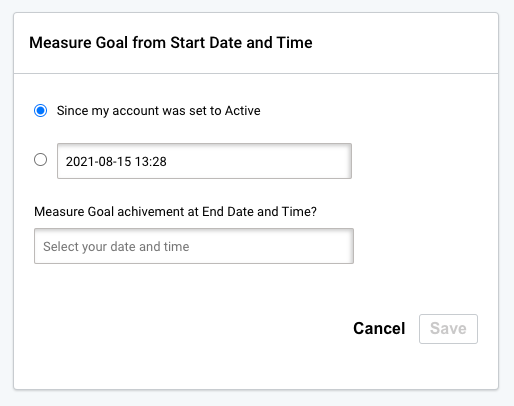
Voila! You have successfully set conversion goals for your Email campaign.
Now that you have quantified the goals you wish to achieve, sit back and let us keep an eye on them!
For the times you wish to evaluate the Email conversions, navigate to the Insights section and check whether your Email campaign has kept up with the set goals!
